Why skiers need video
Skiing might be the hardest sport to judge by feel. You're moving fast, the snow changes from run to run, and a whole turn is over in a second or two. Most skiers are sure they're on their edges earlier, or more forward, than they really are. Video settles the argument.
This guide covers how to film a turn you can actually analyze, which moments to look at, how to compare two runs, and how to turn what you see into one clear next drill. It works for racers, coaches and recreational skiers alike.
Step 1: Film a turn you can analyze
Ski footage has its own challenges: bright snow, long distances and a moving athlete. A few rules help:
- Film from the side of the slope, far enough away to keep the skier in frame through at least one full turn, ideally two or three.
- Keep the phone as steady as you can and pan smoothly to follow the skier. A pole or tripod helps.
- Keep the sun behind or beside you. Bright snow behind the skier can turn them into a silhouette.
- For runs you plan to compare, film from the same spot on the same section of the course.
- Say the skier's name at the start of the clip. In Sprongo, a name spoken in the first 5 seconds is tagged automatically, which saves a lot of sorting on a busy training day.
Step 2: Break the turn into moments
Instead of watching the whole run and forming a general impression, pick specific moments in the turn and look at the same things each time:
- Turn entry: how the skier moves from the old turn into the new one, and when the new edges engage.
- The top of the turn: whether the skier is building the turn early or waiting and then forcing it.
- The apex, or fall line: body position at the point of highest pressure.
- The exit: whether the skier is balanced and ready for the next turn, or recovering.
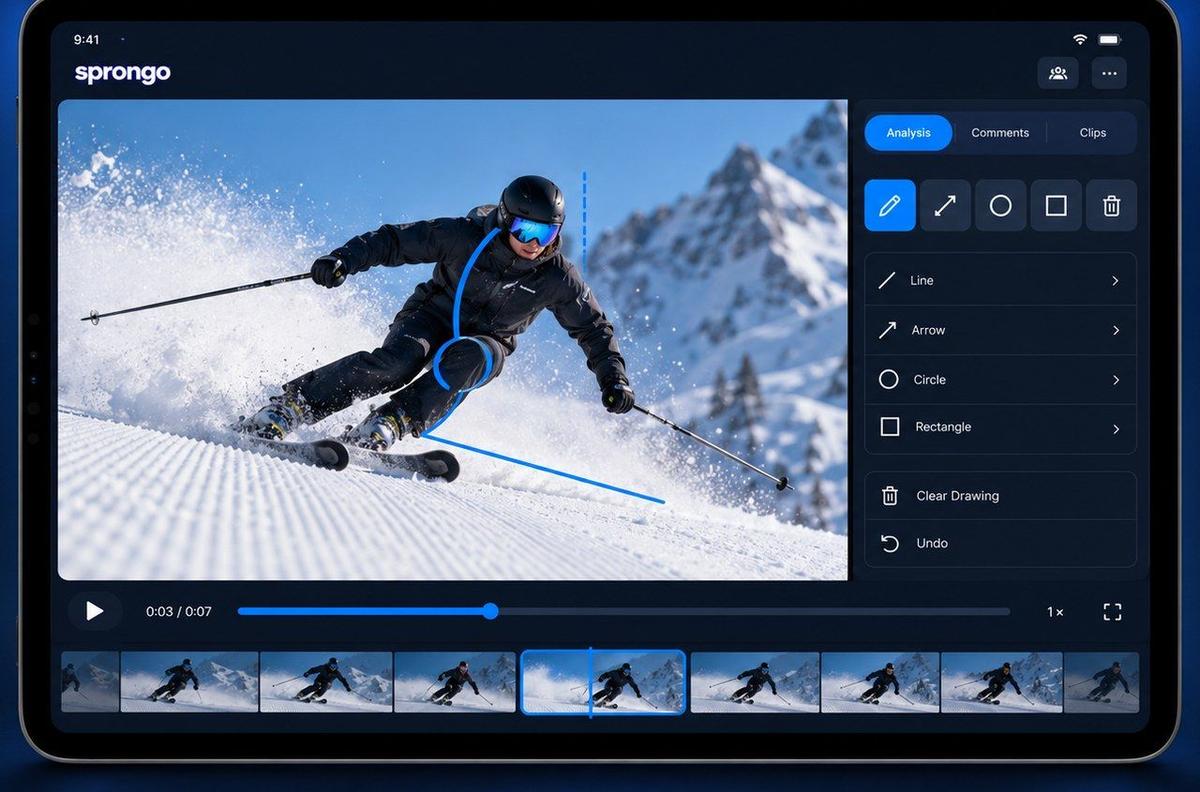
At each moment, follow one body part at a time. The knee is a great place to start, because it shows a lot about stance and flexion through the turn. That's exactly what our launch example does: one GS turn, the knee tracked through it.
Step 3: Track one joint through the turn
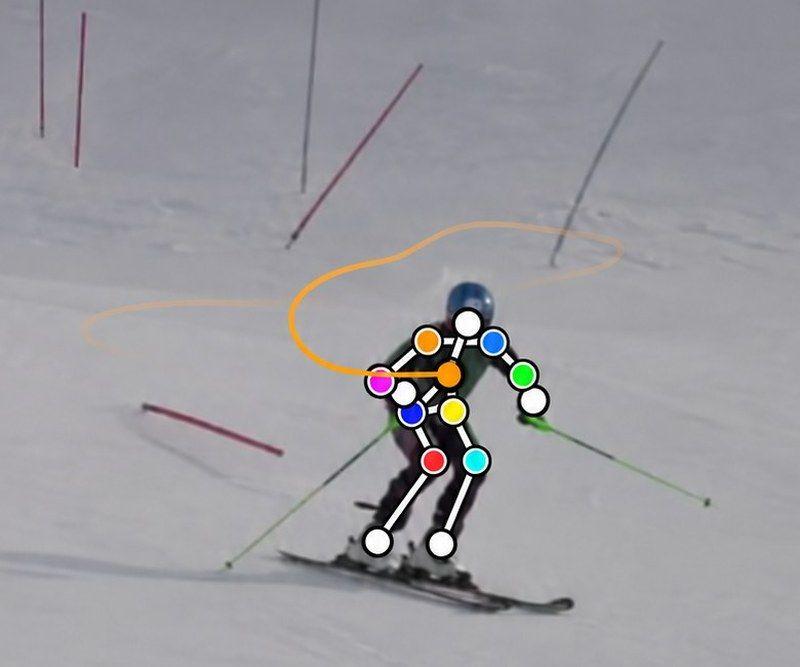
Freezing single frames is useful, but seeing a joint's path through the whole turn shows patterns that single frames miss. In Sprongo, Path Track traces the center of mass or any joint through the movement, in the color you choose, with the joint angles shown on the skier.
Try it on the knee or the center of mass. Questions to ask:
- Does the path look smooth, or are there sudden jumps or corrections?
- Does it look similar on the left and right turns?
- Does the knee angle change the way you and your coach expect from entry to exit?
Step 4: Ask SIVA a focused question
Once you know which moment and joint you care about, SIVA, Sprongo's AI video assistant, can help. Select the joint, choose the moment and ask a focused question, such as "How does my knee move through this turn?" or "Am I balanced at the exit of this turn?" SIVA answers using the movement data in the clip, tells you what it noticed and suggests a next focus.
A few tips for better answers:
- Ask about one turn and one body part, not the whole run.
- Use clips where the skier is clearly visible and not too small in the frame.
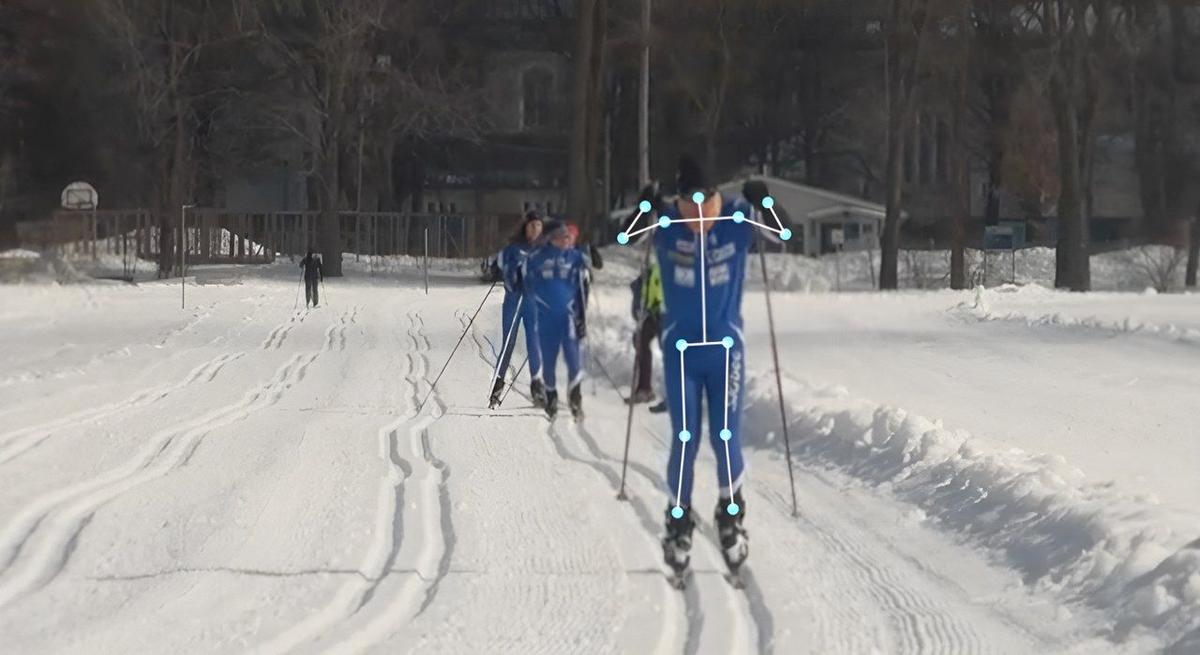
- Remember SIVA reads 2D video. A skier coming straight at the camera hides a lot of side-to-side movement, so a side view usually works best.
SIVA supports your coach; it doesn't replace them. Use its answer as a starting point for the conversation.
Step 5: Compare two runs
The biggest gains come from comparison. Pick two runs, for example before and after a drill, or a good run and a poor one from the same session. In Sprongo, choose Compare from any clip, sync the two runs and slow them down to see exactly where they split. You can view them side by side or overlaid.
Line both runs up on the same moment, such as the edge change into the same gate. Then look for the first point where the two runs look different. That's often more important than anything that happens after it.
Step 6: Agree one next step
End every video session with one focus for the next run. Draw on the frame to show it, leave a voice note so the skier can replay it on the chairlift, and share the exact moment with them. Then film the next run from the same spot and check whether the change showed up.
Common mistakes in ski video analysis
- Filming from the bottom of the slope, where the skier comes straight at the camera and depth is hidden.
- Comparing runs filmed from different spots or on different sections of the hill.
- Judging technique on a turn where the skier was recovering from a bump or a rut.
- Trying to fix three things at once.
- Watching only in slow motion. Watch at full speed first to see rhythm.
For ski clubs and race teams
When a whole team films every day, organization matters as much as analysis. Sprongo team workspaces give your club one shared library, with playlists, tags and Moments, member access, and coaching notes that stay with the moment. Team plans are $49 a month for up to 20 members, $99 for up to 100 and $159 for up to 300.
Start analyzing your turns
Sprongo PRO gives you your own video library, Compare, Path Track and 3 SIVA feedbacks a month, for $10 a month or $60 a year, on iPhone, Android, tablet and the web. Film at the hill, then pick up the same clip on your laptop.
Get PRO, $10/month · App Store · Google Play
Clubs and race teams? See team plans.